How to use ESP8266 NodeMCU V3 Wireless module to connect to WiFi
Components used:
📖 Overview
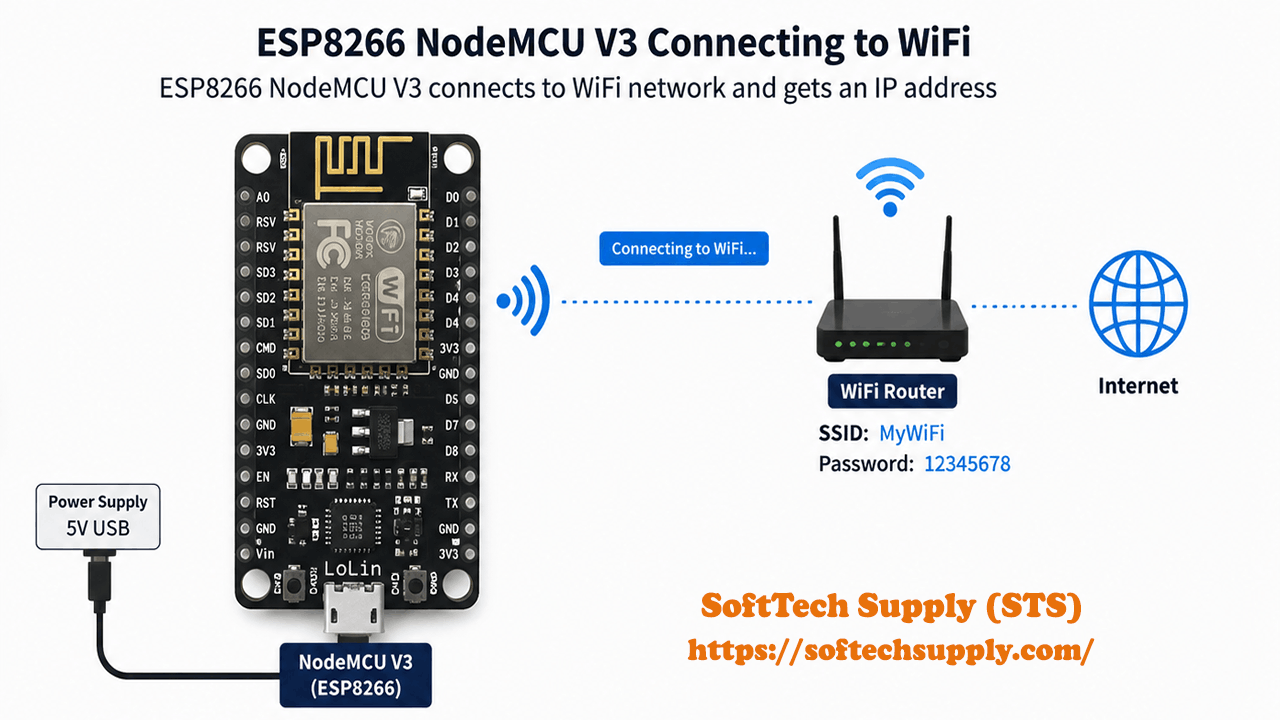
In this tutorial, students will learn how to connect the ESP8266 NodeMCU V3 Wireless module to a WiFi network and display the connection status in the serial monitor. This project is ideal for beginners who want to explore the world of Internet of Things (IoT) and wireless communication. By the end of this tutorial, students will have a solid understanding of how to use the ESP8266 module to connect to WiFi and send data to the serial monitor.
The ESP8266 NodeMCU V3 Wireless module is a popular and versatile microcontroller that can be used in a variety of projects, from home automation to agricultural monitoring. In the context of Rwanda and East Africa, this module can be used to develop innovative solutions such as smart farming systems, wireless sensor networks, and IoT-based security systems. Students will learn how to harness the power of this module to create their own wireless projects.
Throughout this tutorial, students will learn the basics of WiFi communication, including how to connect to a network, send data, and troubleshoot common issues. They will also learn how to use the Arduino IDE to program the ESP8266 module and display data in the serial monitor. The skills learned in this tutorial will provide a solid foundation for more advanced projects, such as developing wireless sensor networks, creating IoT-based prototypes, and designing smart home solutions.
The following topics will be covered in this tutorial:
- Introduction to the ESP8266 NodeMCU V3 Wireless module
- Connecting the module to a WiFi network
- Displaying the connection status in the serial monitor
- Troubleshooting common issues
🔌 Components & Wiring Guide
Components & Wiring Guide
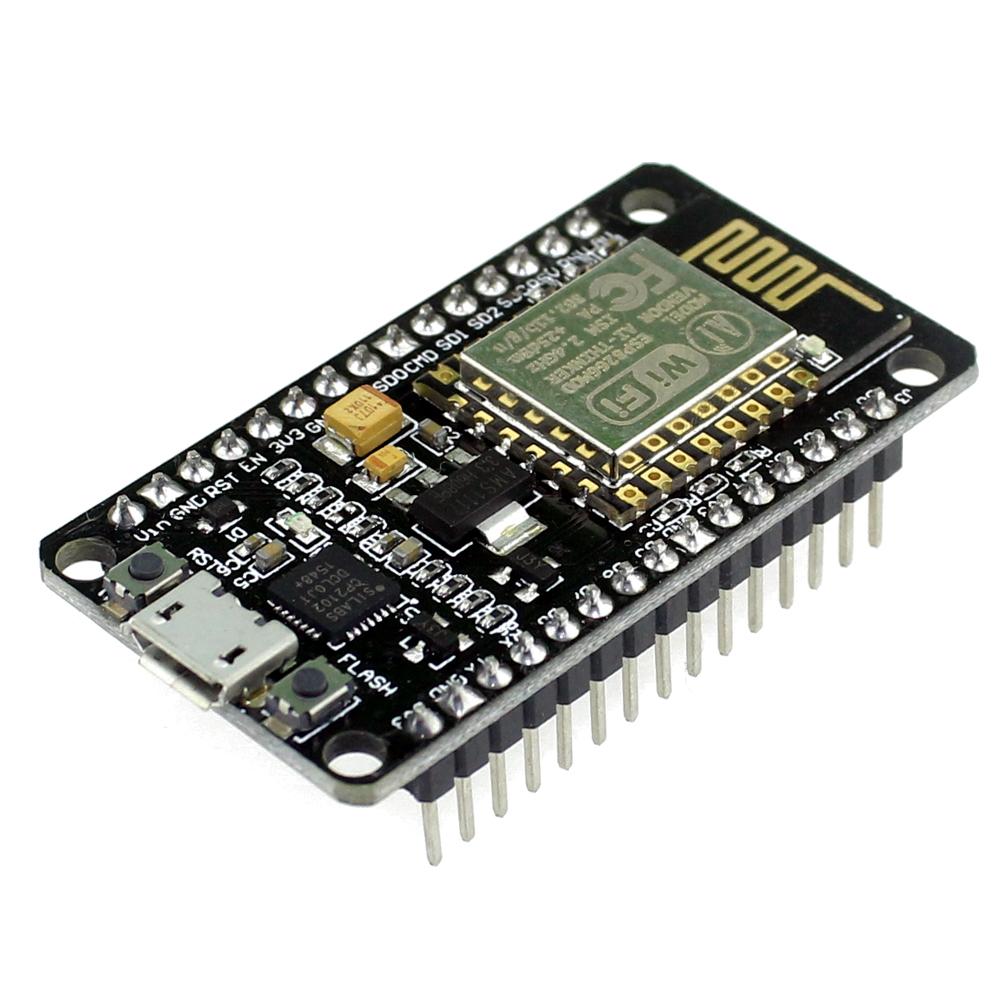
The following components are required for this tutorial:- ESP8266 NodeMCU V3 Wireless module: a microcontroller with WiFi capabilities
- USB cable: used to connect the ESP8266 module to a computer for programming and power supply
Wiring/Connection Guide
To connect the ESP8266 NodeMCU V3 Wireless module to a computer, follow these steps: First, locate the USB port on the ESP8266 NodeMCU V3 Wireless module, which is usually labeled as "USB" or "MICRO-USB". Next, take one end of the USB cable and insert it into the USB port on the ESP8266 module, making sure it is securely connected. Then, take the other end of the USB cable and plug it into an available USB port on your computer. Once the ESP8266 module is connected to the computer, it will be powered via the USB connection and can be programmed using a suitable integrated development environment (IDE) such as the Arduino IDE.Important Connections and Settings
The following table summarizes the key connections for the ESP8266 NodeMCU V3 Wireless module:| Component | Connection |
|---|---|
| ESP8266 NodeMCU V3 | Connected to computer via USB cable |
Safety Note
When working with the ESP8266 NodeMCU V3 Wireless module, ensure that it is properly connected to the computer via a USB cable to avoid any damage to the module or the computer. Also, be aware that the module can get warm during operation, so it's recommended to keep it in a well-ventilated area.🛠️ Step-by-Step Guide
Introduction to ESP8266 NodeMCU V3 Wireless Module
The ESP8266 NodeMCU V3 Wireless module is a popular and versatile microcontroller board that can be used in a variety of projects, from simple WiFi-connected sensors to complex IoT applications. In this tutorial, we will explore how to connect the ESP8266 NodeMCU V3 Wireless module to WiFi and display the status in the serial monitor.
Setting Up the ESP8266 NodeMCU V3 Wireless Module
To get started, you will need to gather the necessary components, including the ESP8266 NodeMCU V3 Wireless module and a USB cable. You can source these components from SoftTech Supply in Kigali, Rwanda. Once you have the components, connect the USB cable to the ESP8266 NodeMCU V3 Wireless module and your computer.
Wiring Recap
The ESP8266 NodeMCU V3 Wireless module has a simple and straightforward wiring layout. The module has the following pins:
- VIN: connected to the 5V pin on the USB cable
- GND: connected to the GND pin on the USB cable
- TX: not connected in this example
- RX: not connected in this example
Firmware Upload
To connect the ESP8266 NodeMCU V3 Wireless module to WiFi, you will need to upload the necessary firmware. You can use the Arduino IDE to upload the firmware. First, install the ESP8266 board package in the Arduino IDE by going to File > Preferences > Additional Boards Manager URLs and adding the following URL: http://arduino.esp8266.com/stable/package_esp8266com_index.json. Then, select the ESP8266 NodeMCU V3 board from the Tools > Board menu and select the correct COM port from the Tools > Port menu. Finally, open the example WiFi sketch from the File > Examples > ESP8266WiFi menu and upload it to the board.
Testing the WiFi Connection
Once the firmware has been uploaded, you can test the WiFi connection by opening the serial monitor in the Arduino IDE. The serial monitor will display the status of the WiFi connection, including the SSID and IP address of the connected network. To connect to a WiFi network, you will need to modify the example WiFi sketch to include your network's SSID and password.
Here are the steps to follow:
- Open the example WiFi sketch in the Arduino IDE
- Modify the sketch to include your network's SSID and password
- Upload the modified sketch to the ESP8266 NodeMCU V3 Wireless module
- Open the serial monitor to display the WiFi connection status
Troubleshooting Tips
If you encounter any issues during the setup or testing process, here are some troubleshooting tips to keep in mind:
- Make sure the ESP8266 NodeMCU V3 Wireless module is properly connected to the USB cable and your computer
- Check that the correct board package is installed in the Arduino IDE
- Verify that the correct COM port is selected in the Arduino IDE
- Ensure that your network's SSID and password are correctly entered in the example WiFi sketch
Safety Note
When working with the ESP8266 NodeMCU V3 Wireless module, please be aware that the module can get warm during operation. Avoid touching the module during operation and keep it away from flammable materials. Additionally, the ESP8266 NodeMCU V3 Wireless module is not designed to be connected to mains voltage, so avoid connecting it to any high-voltage sources.
💻 Sample Code
### Introduction to ESP8266 NodeMCU V3
To begin, ensure your ESP8266 NodeMCU V3 is properly connected to your computer via a USB cable. You can source the ESP8266 NodeMCU V3 from SoftTech Supply in Kigali.

### Setting Up the Arduino IDE
Before you start coding, make sure you have the ESP8266 board package installed in your Arduino IDE. You can add it by going to File > Preferences, and in the "Additional Boards Manager URLs" field, enter http://arduino.esp8266.com/stable/package_esp8266com_index.json. Then, go to Tools > Board > Boards Manager, search for ESP8266, and install it.

### Sample Firmware Code

// Import the necessary libraries
#include <ESP8266WiFi.h>

// Replace with your WiFi credentials
const char* ssid = "your_wifi_ssid";  // Your WiFi SSID
const char* password = "your_wifi_password";  // Your WiFi password

void setup() {
  // Initialize the serial communication at 115200 baud rate
  Serial.begin(115200);

  // Connect to WiFi
  WiFi.begin(ssid, password);

  // Wait for WiFi connection
  while (WiFi.status() != WL_CONNECTED) {
    delay(1000);
    Serial.println("Connecting to WiFi...");
  }

  // Print the local IP address
  Serial.println("Connected to WiFi");
  Serial.println("Local IP address: ");
  Serial.println(WiFi.localIP());
}

void loop() {
  // No need for loop code in this example
}
📝 Check Your Understanding
1. What is the primary function of the ESP8266 NodeMCU V3 Wireless module in this project?
   a) To control a DC motor
   b) To connect to WiFi and display the status
   c) To read sensor data from the environment
   d) To regulate power supply
   Answer: b

2. Which of the following is a necessary component to connect the ESP8266 NodeMCU V3 to a computer for programming?
   a) Breadboard
   b) Jumper wires
   c) USB cable
   d) Power adapter
   Answer: c

3. What is the purpose of the serial monitor in this project?
   a) To upload code to the ESP8266 NodeMCU V3
   b) To display the WiFi connection status
   c) To debug the code
   d) All of the above
   Answer: d

4. What should be done to ensure the ESP8266 NodeMCU V3 connects to the correct WiFi network?
   a) Enter the correct WiFi network name and password in the code
   b) Use a WiFi network with no password
   c) Connect the ESP8266 to a different WiFi network
   d) Restart the ESP8266 NodeMCU V3
   Answer: a

5. What safety precaution should be taken when working with the ESP8266 NodeMCU V3 and a computer?
   a) Touch the ESP8266 NodeMCU V3 pins with your bare hands
   b) Connect the ESP8266 NodeMCU V3 to a power source other than a USB cable
   c) Use the ESP8266 NodeMCU V3 near water
   d) Avoid short circuits and use the USB cable provided
   Answer: d
Need the Components for This Project?
If you don't already have the components listed above, you can buy genuine Arduino, ESP32, Raspberry Pi, sensors, and other electronic components from SoftTech Supply Shop, with fast delivery across Kigali and other parts of Rwanda.
← Browse more Arduino & IoT tutorialsRelated Tutorials
How to connect GSM SIM800L with Arduino Uno to send an SMS or make a Call
Arduino UNO R3 removable IC Chip with USB CABLE, Smallest SIM800L GPRS GSM, Male to Female jumper wires
How to Install the Arduino IDE and Get Started on Your Computer
Computer, Internet connection, Arduino Uno R3 With USB Cable
How to use ATGM336H GPS+BDS Module with Antenna with an Arduino Uno
ATGM336H GPS+BDS Module with Antenna, Arduino Uno R3 With USB Cable, Male to Male Jumper Wires, Breadboard 830 Point Solderless
How to use RFID Reader Module 13.56Mhz with an Arduino UNO
RFID Reader Module 13.56Mhz, Arduino Uno R3 With USB Cable, Male to Male Jumper Wires, Breadboard 830 Point Solderless